Beginner to Advance Introduction to Git/GitHub
by brane105

here we go ….
Git:

It is a version controlling system. It helps to collaborate each Developers together work in a team. Git is a DevOps tool used for source code management. It is a free and open-source version control system used to handle small to very large projects efficiently. Git is used to tracking changes in the source code, enabling multiple developers to work together on non-linear development.
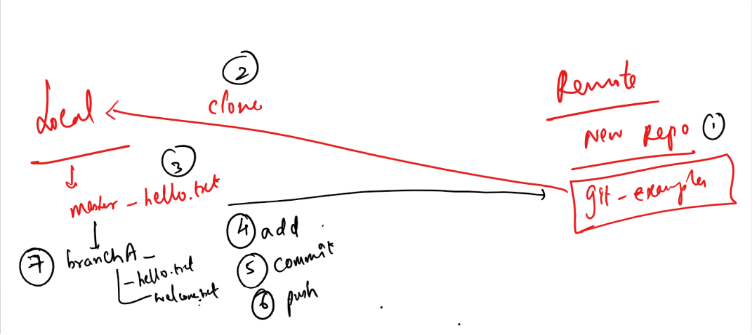
There will be two repositories in the GIT
- Remote: Will have access to everyone
- Local: Local to the particular individual
Git provides commands to update each others work
- push: It tries to update the remote repository from the local repository
- pull: It tries to update the local repository from the remote repository
- clone: It creates a copy of remote repository in the local repository, it is done for the first time before you can enter push/pull
- merge: It is used to manually merge the updates in the local repository from the local branch
- add: It is used to add the changes to the staging area, only the changes in the staging area can be committed and pushed
- commit: it is used to commit the changes, it creates one unique id which is used at the time of merging
- status: It is used to see the changes done in the local repository, it shows the changes in the staging area and the changes not in the staging area
Git branches:
It is a pointer of particular commits, by default git gives you one branch called master/main branch, but every individual must work in custom branch not in the master branch
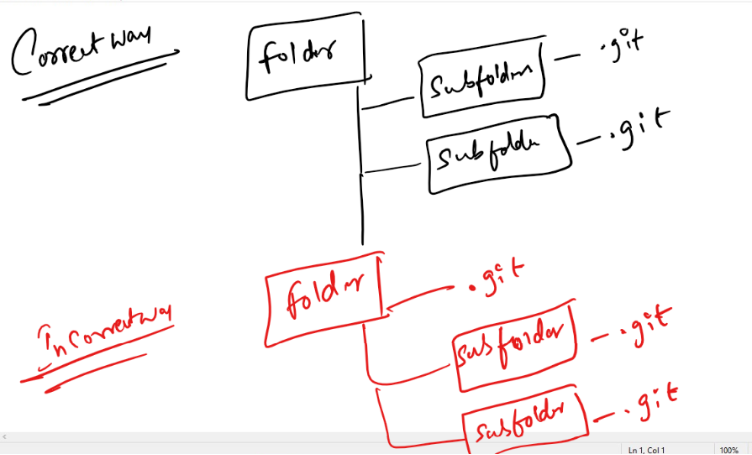
You must have a single .git folder which represents the git repository in the parent directory, but nested repositories you must not have ie.., an enclosing folder having .git and the sub folder also havening .git.
Steps to work with GIT
- Create a GIT account & login
Create a remote repository & name it
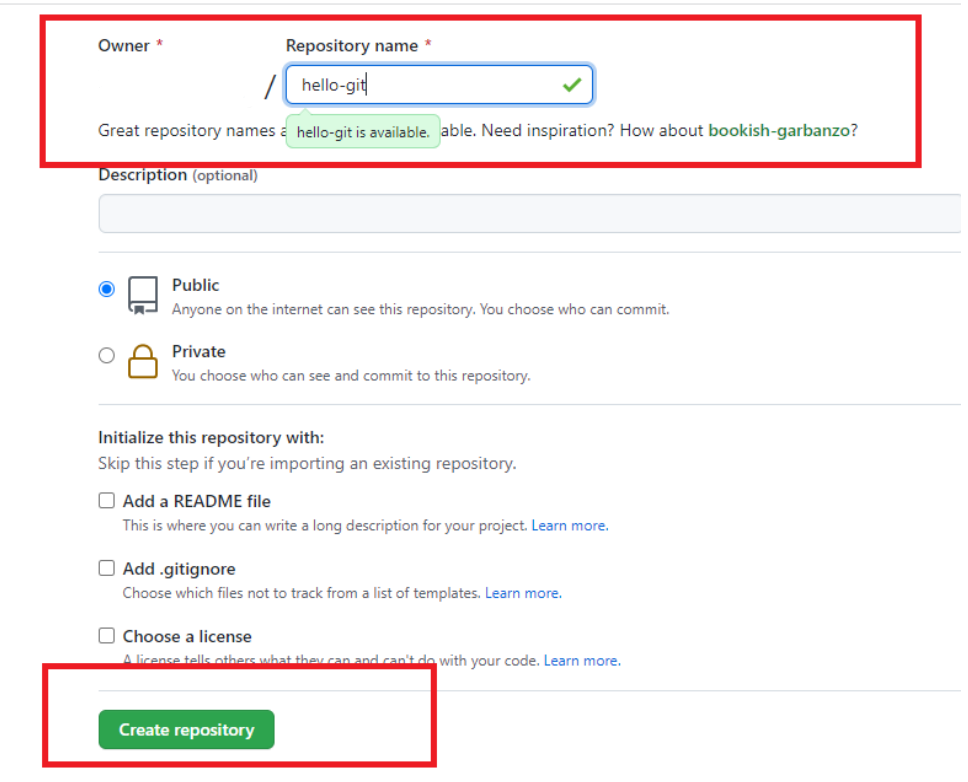
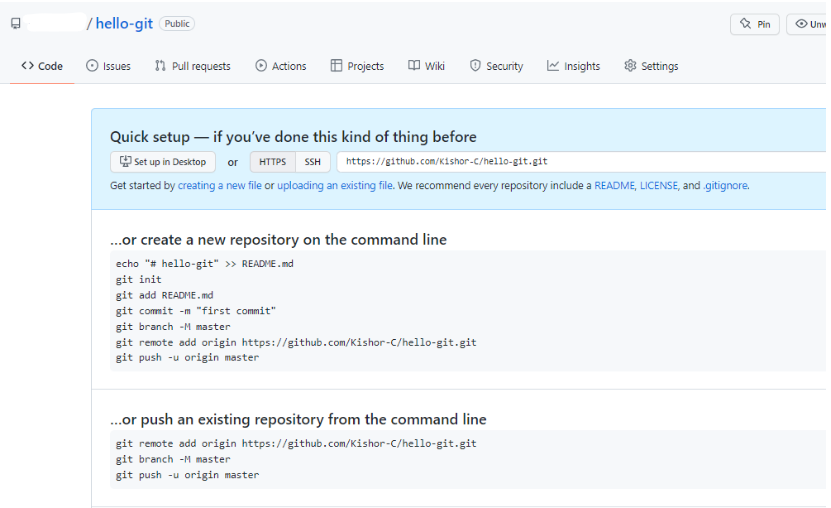
After you create the repository you will see the empty repository in the git website
4.Clone the Remote repository in the local machine Command: git clone URL
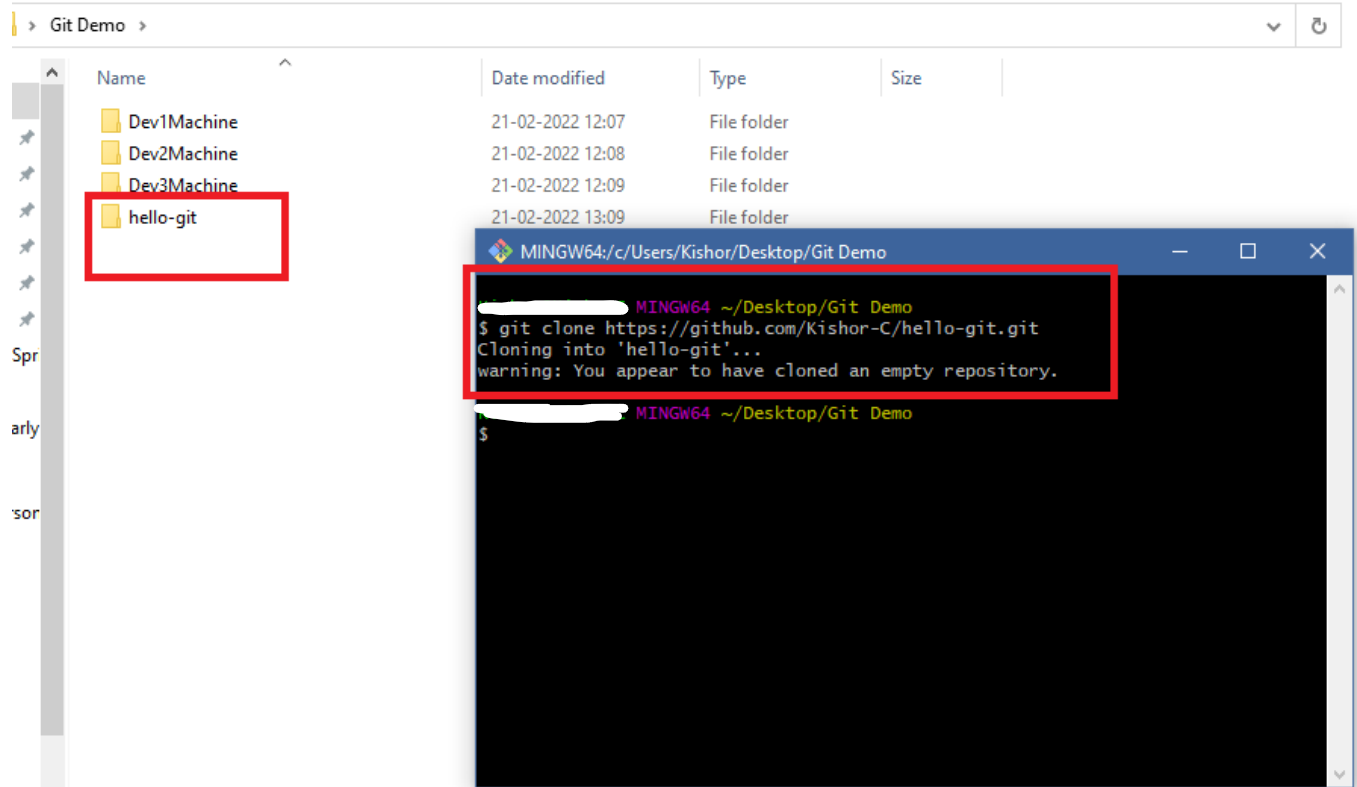
Note: You don’t see the branch name in the GIT bash, because you need to navigate to hello-git
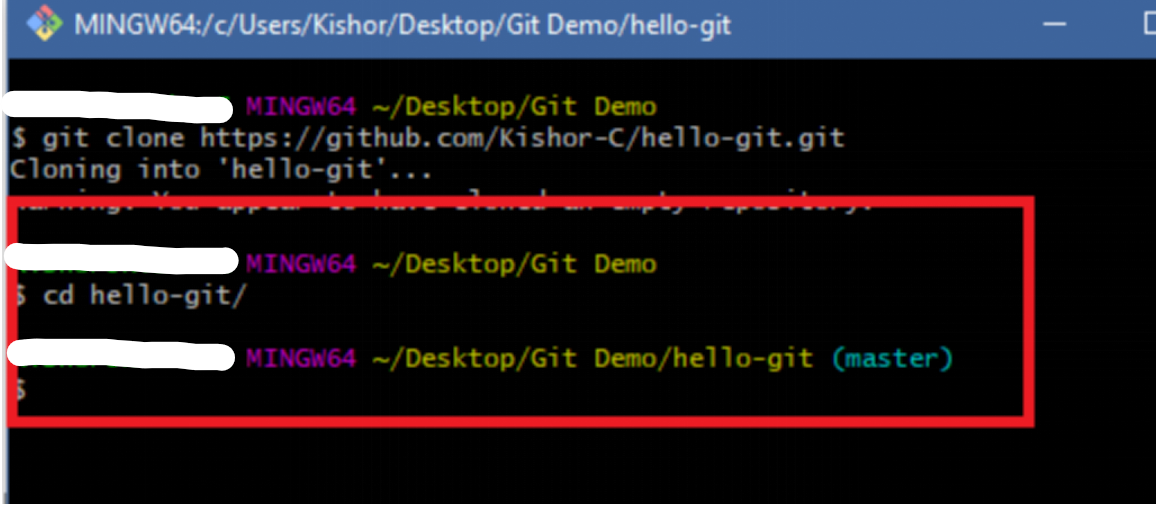
5.Navigate to the local repository cloned
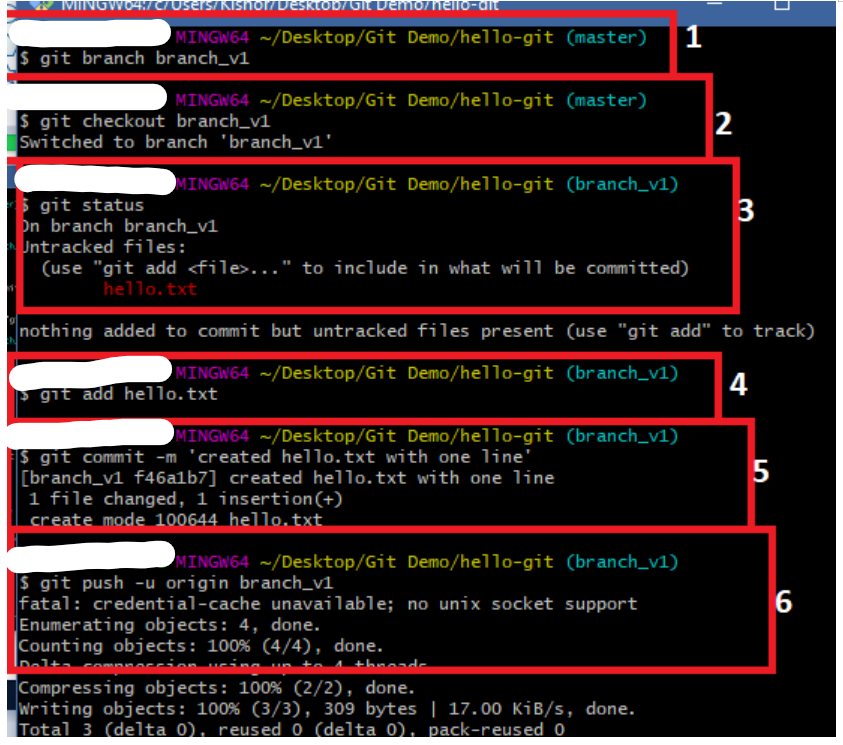
6.Create a custom branch when you want to do any changes/updates
- Command: git branch branch_name
- Command: git checkout branch_name
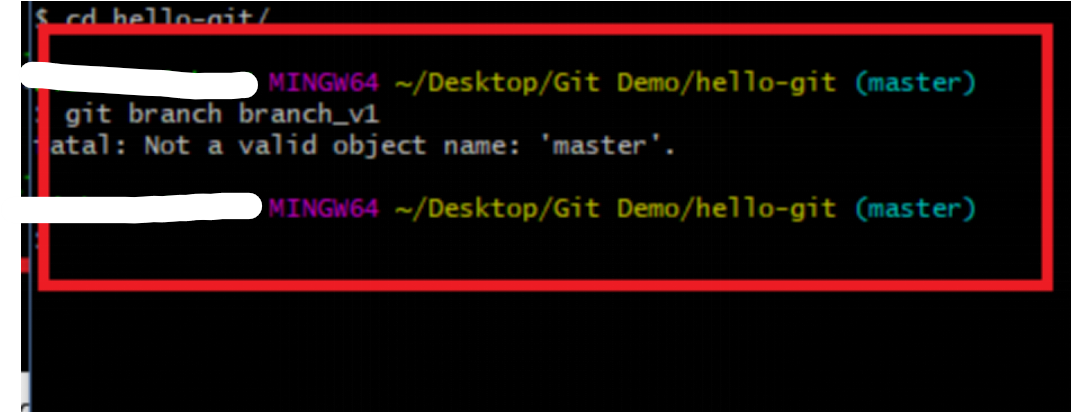
- Note: You may get this fatal error, when there are not commits in the master, i.e., if its empty repository you can’t create branch
- To avoid this in the master branch create 1st commit
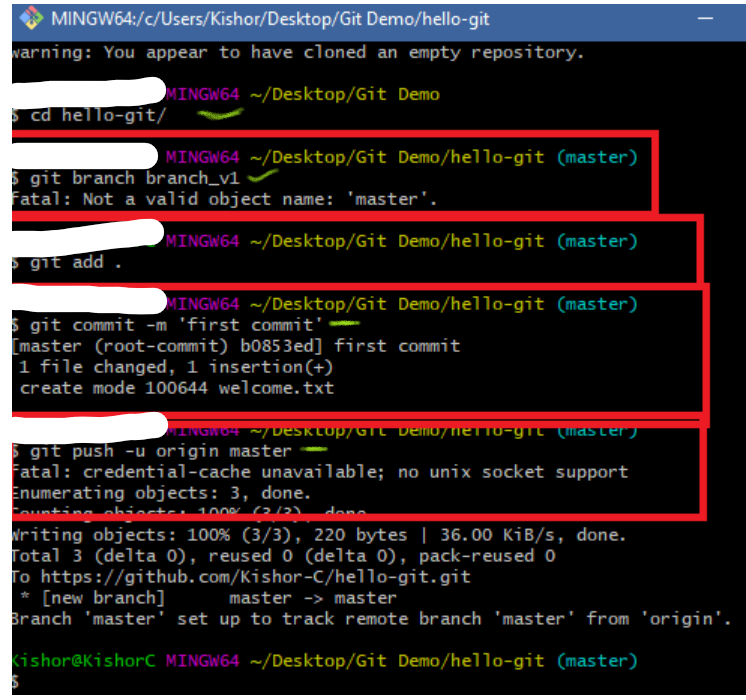
In the Remote you can see that first commit
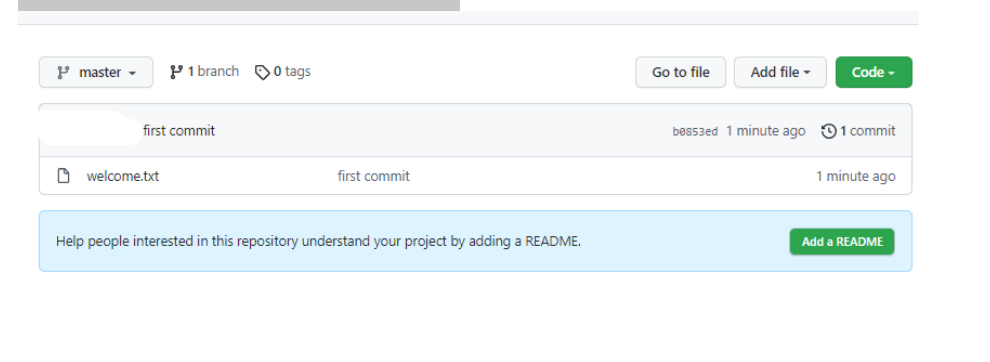
Note: It doesn’t ask you to create pull request, as we pushed master branch
7.Now we can create a custom branch and push that branch to the Remote repository
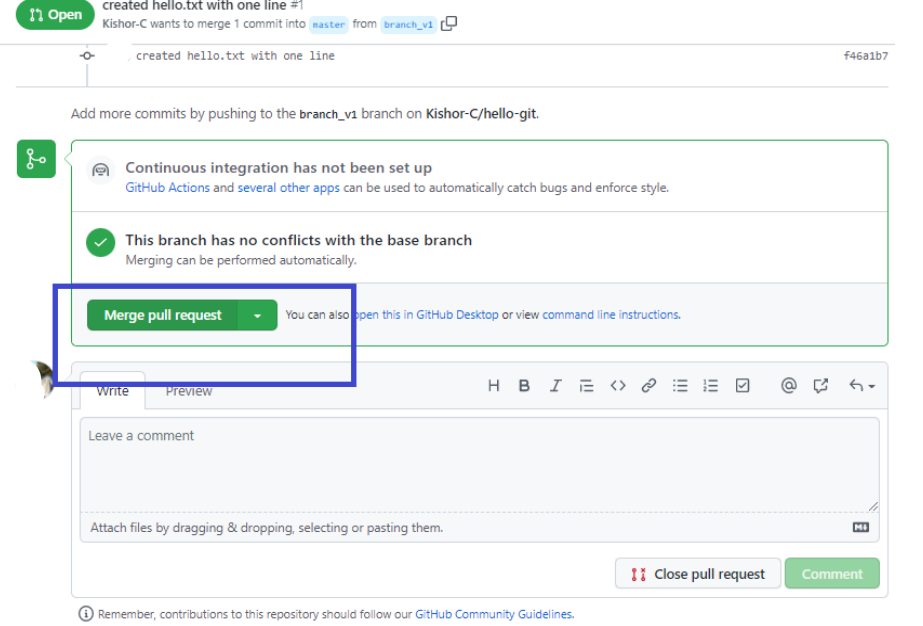
8.Now you can see a pull request in the Remote repository
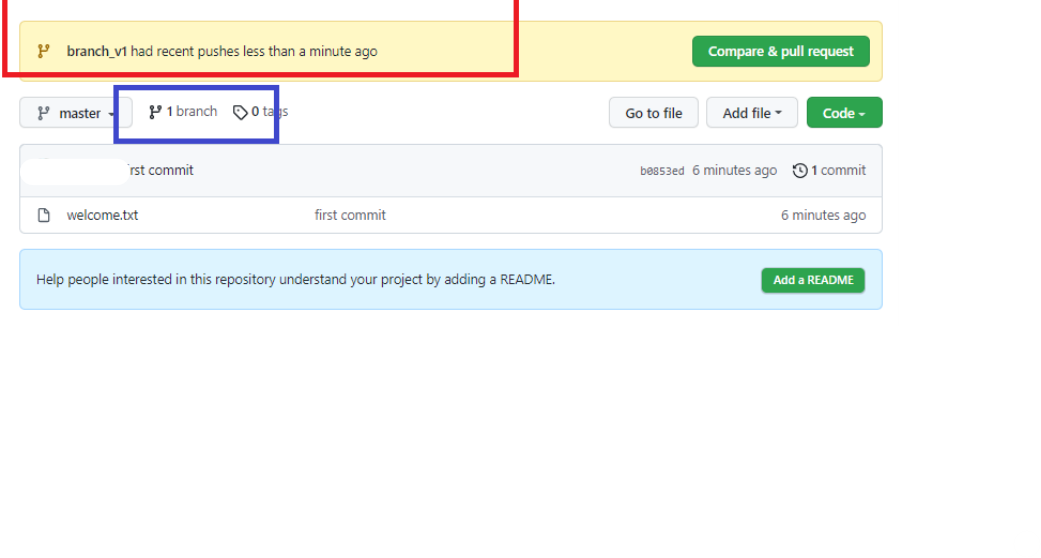
Note: Sometimes you may not see the recent push branch with Compare & Pull request, in that case you click on the branch highlighted in blue color
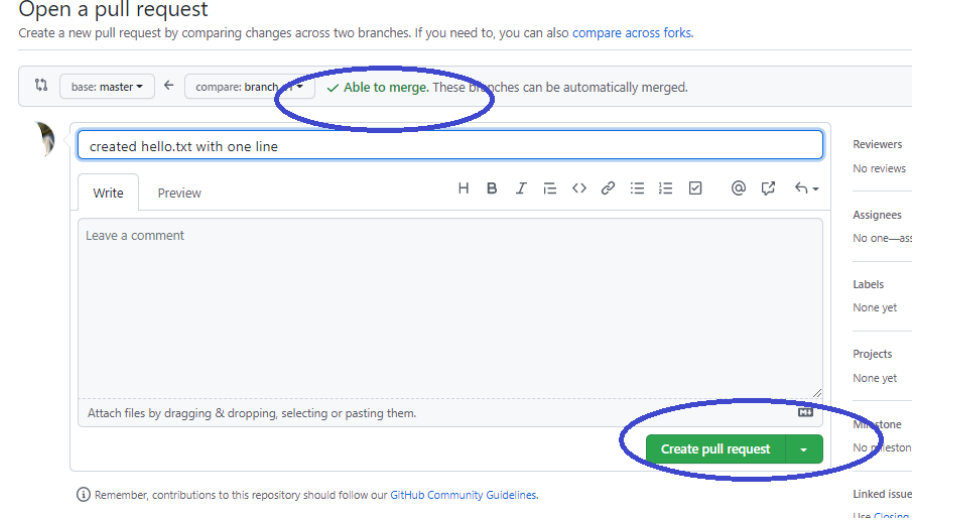
9.You can click on compare & pull request to update the remote or close pull request when there’s a conflict, in either of the case you must delete custom branch in remote repository.
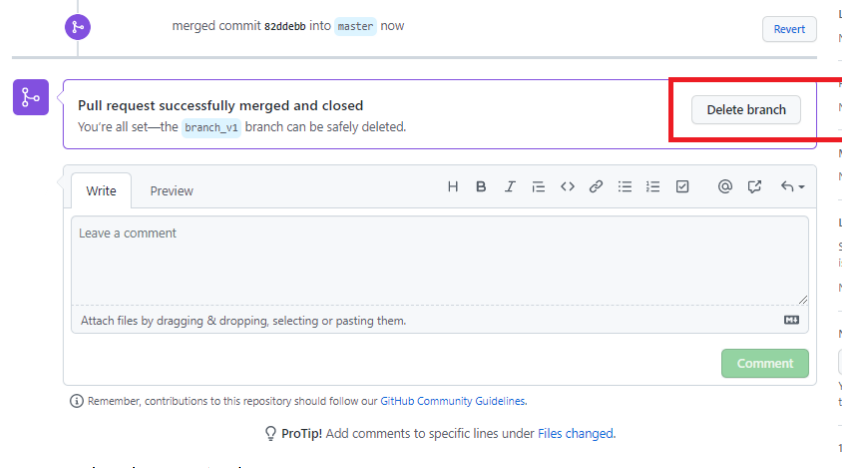
Merge the branch & delete
Delete branch
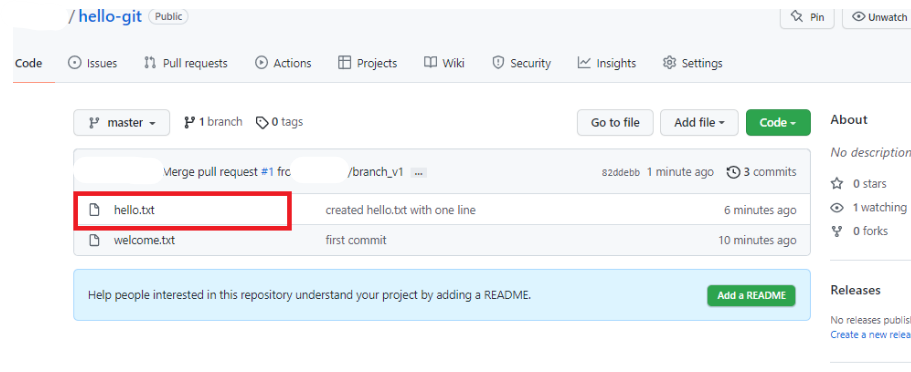
10.You can see the changes in the remote
11.If you get a conflict then the local repository must pull the changes of master to its master branch, suppose for the below changes we get conflict when we try to update

12.Add some content to the hello.txt & try to push the branch
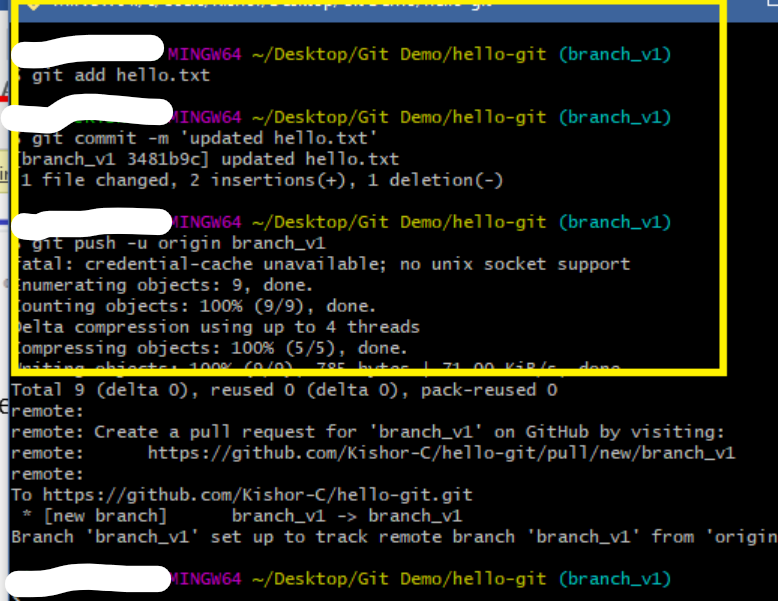
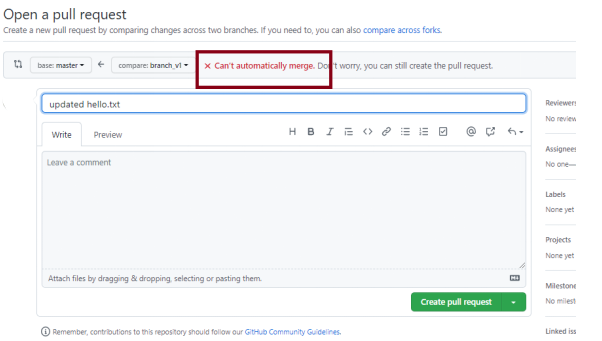
13.In the remote we see a pull request, but it can’t merge as remote master & the custom branch has conflict
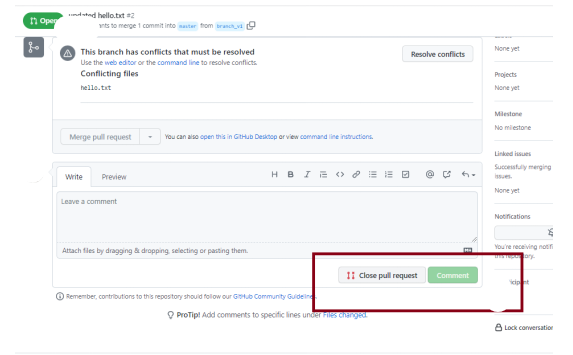
14.Close the pull request & delete the branch in the remote
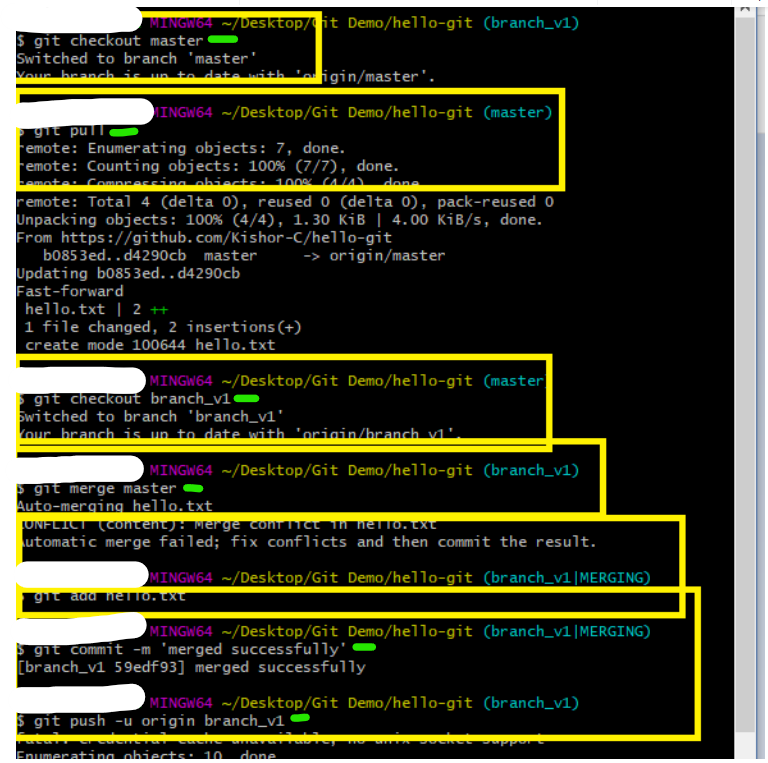
15.Local master must pull the remote master, then the custom branch should merge
the local master and resolve the conflict
- Checkout to master: git checkout master
- Pull the remote master: git pull
- Checkout to custom branch: git checkout branch_v1
- Merge the master with custom branch: git merge
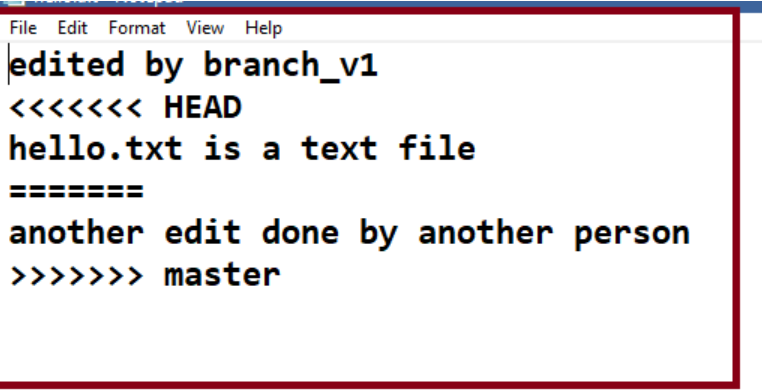
- You will get conflict, edit that file, add & commit & push, you will the conflict file as below:
- All the steps performed.
16.Now you can see the pull request in the remote
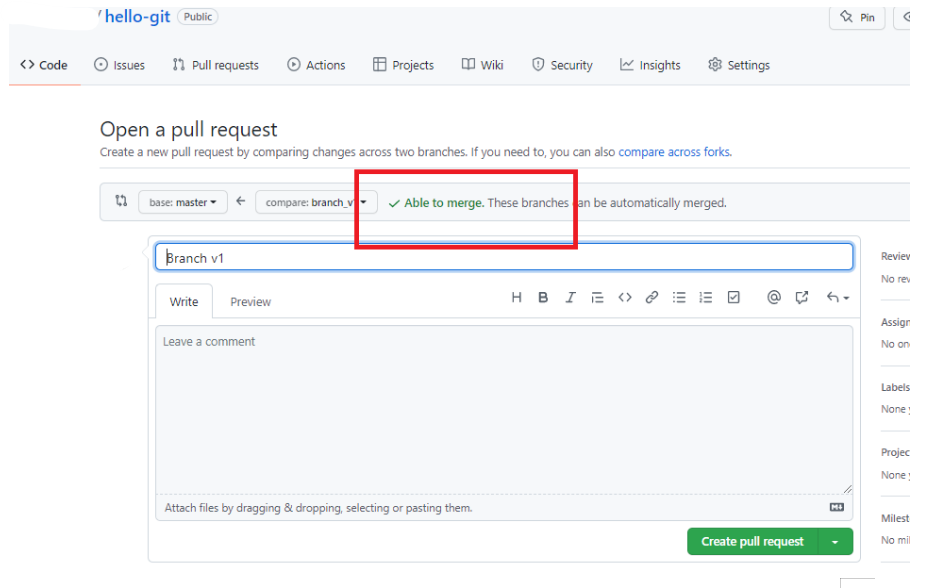
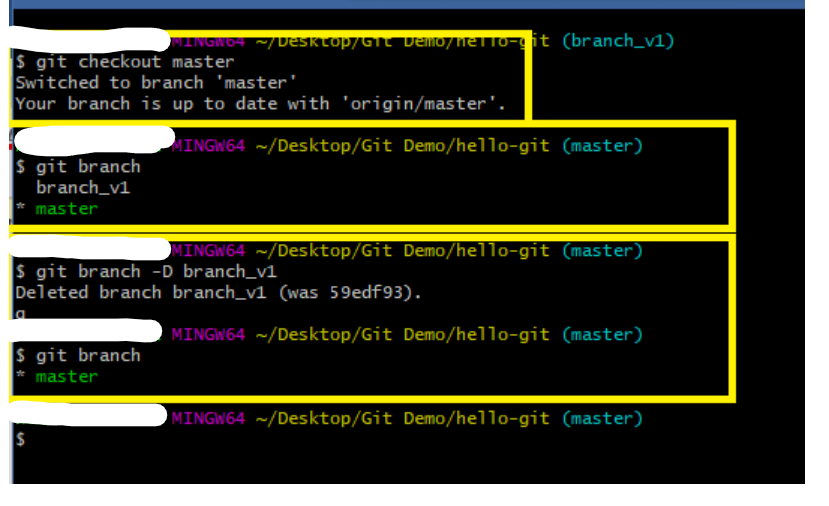
17.Create pull request & merge it and delete the branch in the remote, if required delete it in the Local also
Command: git branch -D branch_name Note: Checkout to different branch to delete
Summary:
- There are 2 ways you can create the local repository
- using git clone remote-url
- using git init & add remote url in the local repository 2.Important commands of Git
- git clone: creates a copy of remote repository in the local machine
- git init: creates a local repository
- git log: shows all the commits done with date, time, message & author information
- git status: shows all the tracked & untracked updates
- git add: adds the update to the staging area
- git commit: commits the updates in the staging area
- git push: pushes the branch to the remote from the local repo
- git pull: pulls the branch from the remote to the local repo
- git merge: merges the branch with another checked out branch
if you see these msg thank you so much for showing interest in reading my article these are my training notes which were so much of detailed that i had to share with new aspiring devs thanks again.
